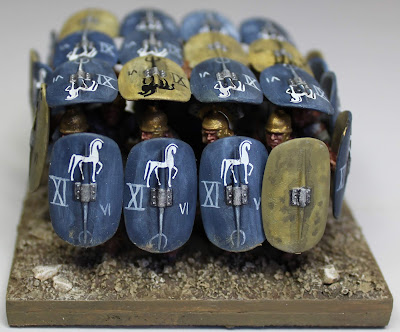
Caesarean Testudo: Part 2
It was quite the effort but the experiment is complete and I declare it a success. I now have the first of several Roman Caesarean testudo.
Having undertaken the mock-up (see previous posting) I them fixed the figures to craft sticks in their order for painting. This prevented me from mixing them up and to ascertain how much of each figure would be exposed so I only needed to paint the outside. I won't do this again as it made painting difficult and I think there's a better way of numbering them to enable painting individually.
Painting this set of shields was also more difficult than being able to get in close and personal with each individual shield but I can't see a way around that. The decals also needed cutting away where it appears they tuck in under the overlapping shields.
Once painted to their matte coat stage, I then glued them to their base.
Later on I cut the centurions gladius arm off - it didn't fit and you couldn't see it anyway.
I had to cut away the corner shield holder's stand away to get him in close enough to the front rank. It's a tight fit in there.
Then I built the unit back from the front rank.
Once built, I spray coated the whole model with my matte picture varnish and then painted the metallic finished on shield boss, mail, gladius and helmets.
I've learnt a few lessons in this approach but they will be refinements to a process I feel works really well.


Your Testudo looks cool!
ReplyDeleteMost impressive and superb!!
ReplyDeleteWow! Looks fantastic!
ReplyDeleteThis looks brilliant Greg. As usual.
ReplyDeleteFantastic execution ol' boy! Well done!
ReplyDeleteVery well done. And you did a good job with those W Factory plastics. Cheers.
ReplyDeleteFabulous work mate, cracking effort
ReplyDeleteCheers
Matt
Cheers Matt.
Delete