Argives A-Go-Go: Underway
An unexpected break from work brought on by a second bought of Covid-19 has seen me isolated but finding a silver lining. When able, I have commenced painting two Hoplite phalanx units (24 figures each) and two slinger units (8 figures each) simultaneously.
Apart from painting four units at once, I am also approaching how I paint these figures very differently. I am seeking to speed up my painting this time and to do so I have turned to Sonic Sledgehammer Studios (YouTube) and his series 'How I paint Things'. In short, I am applying a block painting and Army Painter wash technique.
I really liked how it finished off the bronze armour so nicely with very little effort - just one coat of basic bronze and then dark-shade over the top. I have; however, learnt a few lessons along the way.
I habitually undercoat in white (to see what I'm doing) which gives me brighter and I think truer colour effects. Having said that, there is a lot of bronze on a Greek Hoplite and using Vallejo Brass (174) really requires two coats - which has affected the time and effort equation considerably. I also use a lot of Humbrol enamels and I have to be quick and careful applying the Dark Tone as it can react and wipe away my thin washes of paint.
So it looks like two coats of brass (albeit a simpler overcoat) and then a wash of Dark Tone and then a dry brush of Old Gold. I will be matt spraying the whole lot and may have to lift the bronze armour with a semi-gloss varnish at the end - we'll see.
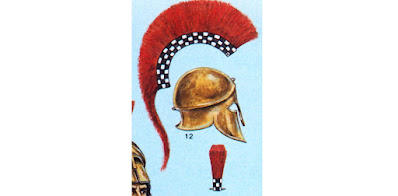
As I'm using shield decals this time, the most complex paint job has been the helmet crests. This is the only section which I am not using the Dark Tone on and have stuck to my layering method. Furthermore, the crest holder of a hoplite helmet was made of wood (most like) and seems to have been painted in intricate patterns - certainly intricate at 28mm scale.
I find painting irregularly equipped units the most challenging (and time consuming) and can get lost in randomising how I paint whole units. So, I sketched a dozen patterns for crest holders from all of my references (quite a few) and batch-painted them accordingly. I used the convention of white detail over dark background (so white lines over red, black or blue) and black detailing over white, yellow or tan.
All of my Greek miniatures are from the First Corps Curtey's Miniatures range and the image above is from their Command at Ready supplementary pack. I love these figures as they come with two types of Corinthian helmet with a combination of two low crests and one high. The spears are also just the right thickness and substantial enough to be less prone to bending/drooping. I hate floppy spears and this saves me a power of trouble making my own from steel wire.
The narrowness of the crest holders on some of the sculpts prevented fully replicating some of the more complex crest holder patterns. Such is life.
I am pretty much painting a half-army at once. For the second half I will undercoat (prime) these metal figures with a light brown or even flesh colour which will take the brass paint better (perhaps permitting one coat) and even save painting the flesh as a separate application.


I shall follow his with interest Greg, although it isn't my chosen period the painting method can be used on any figures. Have you thought of using nuln oil to age the bronze... just a thought as I use it on my cannon. BTW, love the corks, it has been a long time since Aussie winemakers used them and I think they would make more stable painting plinths than the metal ones I use. Sonic Sledgehammer certainly has some good tips, thanks for the reference.
ReplyDeleteThanks Chris. As I have quite a lot of the Army Painter shade, I'll stick with it when using this technique for the time being - but I'll remember your tip.
Delete