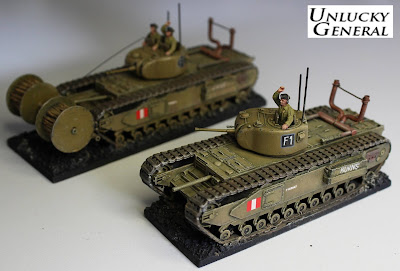
Churchills Chief & Burns My Dieppe Part 5
Two more down with one to go to round out my first two Calgary tank troops for Dieppe. A slight delay was experienced when my magnifying lamp bulb failed but an extremely timely visit by my old wargaming mate Grant saw it replaced.
My Chief command Churchill Mk I has two figures proud of their hatches (obviously) and both are from the Hasegawa kit with one converted to reposition his arm. The snorkel exhaust like the others were modelled using aluminium tubing and fuse wire.
For the construction of the chespaling bobbin array see my previous posting Chief & Backer: My Dieppe Part 2. Apart from painting it I fixed a length of poly broom bristle which I bent and fixed at the loader's hatch and the chespaling rig.
Even I have to admit that I'm pretty happy with the results and in spite of the age this build took at least I've ended up with a reasonably unique representation for my Dieppe raid. Oh, and because the release or control wire to the bobbin is fixed to the turret, it's the only model whose turret is fixed into position.
And here's Burns, the other troop command tank. I like to differentiate my command tanks with their commanders exposed - perhaps he's waving at Chief? I'm a little over building and painting WWII stuff to be honest but will push myself to finish the two dingoes and the Mk III before leaving for other time periods.
My Chief command Churchill Mk I has two figures proud of their hatches (obviously) and both are from the Hasegawa kit with one converted to reposition his arm. The snorkel exhaust like the others were modelled using aluminium tubing and fuse wire.
For the construction of the chespaling bobbin array see my previous posting Chief & Backer: My Dieppe Part 2. Apart from painting it I fixed a length of poly broom bristle which I bent and fixed at the loader's hatch and the chespaling rig.


Impressive and superb vehicles, well done!
ReplyDeleteAbsolutely awesome! Really like the olive-green colour.
ReplyDeleteLovely looking finish, great project!
ReplyDeleteBest Iain
Very well done!
ReplyDelete