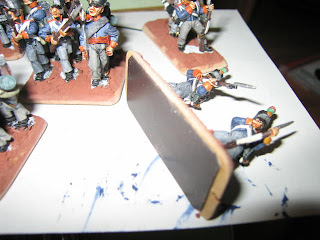
At least my first Dutch regiment is completed. I have represented the 8th Dutch Militia which fought so doggedly at Quatre Bras but wavered at Waterloo. When I look back over all of my miniature armies, there is a conspicuous bias toward collecting British armies - particularly red coats. Like many young boys living in England (which I did for some years) I started my collecting early and delved into
Airfix 1/72nd scale plastic figures from their Waterloo collection. From the age of six, armed with 19 pence (two weeks pocket money) I habitually attended the toy shop in Pettswood high street and returned armed with my latest packed of soldiers. Twenty years later a good friend and I decided to return to the hobby and 25mm Napoleonics gaming in the
Grand Manner was our chosen poisen. Having been building a British Peninsular army for years now, when I determined to return to the grass roots of Waterloo I had had enough of red coats so went for their Dutch and Belgian allies and so here is the first of them.
I have taken particular care with this unit and experimented with a couple of different painting techniques. I always undercoat in white and I use
Humbrol enamels almost exclusively. I am an ageing older dog and doubt I'll ever change. I prefer the unltra flat effect of their paints for clothing and enjoy mixing whatever shades of colours I choose. I personally dislike the more popular shades of blue found in Citadel paints (for example) and their competitors and I dislike the sheen finish. I also prefer working with mineral terpentine - the cheapest and best cleaning solution and combined thinner in my view. I still marvel that after my many, many years of painting I can still evolve as a painter and wonder if that will ever cease. Still, there is only one person whom I need to please and that is myself as I tend to keep all my figures forever and only play with what I paint.

I tested two techniques when painting the trousers. The first was a very thinned application of darkened grey to the creases, a ligher shades immediately applied to the rest of the trouser and a lighter dry brush over the top when truly dry. A tip for those not familiar with enamels: do not thin the dry coat if you are not prepared to wait at least 24 hours between coats or you can lift the paint from the highlights. The problem with this technique is that it takes time and is a little painstaking. The benefits are that is is a good result. The dry brushing gives a seamless transition from deeper, darker areas to the lighter highlights - unlike the 'blocky' effect that more commercial painting services can achieve, seen when photographed too closely.

The alternative technique began the same with darker grey running into the creases but then I let it dry. I later applied a thinner and ligher general coat over the top which allows the darker shade to come through. On a white undercoat, the thinned light grey provides seamless highlights also as the pigment settles into deeper areas of the sculpt, thus providing at least three depths of shade. This worked better than I anticipated and was also a lot quicker than the dry brushing - in fact it was a relief. I was in fact pleased with the variances both techniques provided within the unit as I perfer to represent variance within uniformed regiments - albeit subtle ones.
A quick word on undercoating. I have now returned to brush and thinners when it comes to undercoating my figures. I used spray packs for many years of every brand imaginable. In the end the subtleties required for applying thinned enamels requires a non-porous coat. Unfortunately, spray coats leave a result rather like blotting paper which takes my paint in all directions leaving me with much reduced control over the initial applications. My friend Matt and fellow Goulbourn Gamer has perhaps found the real answer which is a spray gun but I am content to soldier on with
White Knight Rust Guard epoxy enamel for some time to come. Besides, my turn-over of figures is not that high anyway. A last word on undercoating in white with thin painting techniques is that depths can be achieved with less applications - just two or even one.
I don't know who started this trend but I remember first seeing the gents from the
League of Augsburg using a three day growth effect on their figure's faces and I have been a fan ever since. In this, I depart from my normal enamel loyalties and use acrylics for the faces with a diluted applicaiton of black ink. Having said this, I vary the clouring of my troops with a mixture of blondes through to brunettes and only use the unshaved look for the dark haired soldiers. I always finish off the faces and heads first (minus the head gear) unless I need to get a collar colour in underneath long hair. By painting faces first my white models begin to come to life at an early stage and I am motivated to continue. AND motivation can be a tricky business when painting troops at a 1:20 representative scale. With a family and career to squeeze in around my hobby, discipline is required to progress even one battalion toward completion. My rule is one application per day and in a month at worse, the regiment is raised.
Before you know it, it is time to base. I always go through this fantasy that when the figures are finished being painted it is all but over but in fact I have several stages when it comes to basing. I use MDF craft wood (3mm) which I cut to size on my band saw (an essential tool for my shed) which is then chamferred and sanded. I glue magnetic sheeting to the base and then sculpt the bases using pre-mixed and coloured wood putty. If I am installing standing grass clumps I normally cut holes with a scalpel and fix before sculpting. In this instance, I wanted a crop line running through the length of the unit so I impressed a groove running through the putty with a toothpick and then glued my vegetation into it when set. I glued my vegetation using
Selley's Liquid Nails and the crop 'grass' is dyed coir from a welcome mat.
Once dry, I fixed rubble which was mouse litter mixed with medium sand using PVA glue which is coated in diluted PVA glue when dried to set it properly. Once dried, I paint in is a series of ever lightening earth tones with an eye to representing furtile, western European farmland benefitting from good rainfall. I finished off with two tones of static grass (which I mixed myself) at the outer edges and at strategic points to cover obvious sections of the figure bases which might be seen. Overall, I am reasonably pleased with the effect which was, after all, an experiment. The last touch to the base is a new habit I have of identifying the unit on the back right hand corner - black gloss paint over white. Given that my Brigade will have a number of similarly uniformed Dutch Militia battalions, this will prove invaluable.

For the 1815 campaign, the Dutch had only just reassembled a national army and regulations had yet to be formalised on the carrying of colours. That being so, I elected to speculate on what they might have carried having determined that they required something visual to rally against and form up under. For this battalion I went for a simple national colour and given the only recent departure of the Dutch from French service, I thought it reasonable to follow their trend in colour size. I also like to represent a little battle damage, especially given their involvment in the previoius days action. All of my colours or standards in every army is hand made and painted using tissue paper, drawn on, painted and coated in a matt finish. On that subject, all of my figures nowadays are spray finished using an artists flat matt product obtained from artistic suppliers. The only thing to bear in mind is that metals should be left as a final touch after this protective coating is applied - if possible. I now leave 1815 and return to my revisited Spanish Succession Dutch army now that my extra figures have arrived.


lovely, but will they die like your gaurds, or hide like your portuguese!
ReplyDeletecheers
matt
Great looking armies you have there. I have just re-based all my Spanish Napoleonics for the same rules. Thank you also for the comments in regards to Elite Miniatures. It is geat to see some positive feed back.
ReplyDeleteRegards
Nathan
Elite Miniatures Australia
Thanks Vinnie - always happy to give Elite a wrap. I find them the best core of a 28mm army - a good variety of poses, nice proportions, good rigidity and they look great is massed battalions.
ReplyDeleteThey look great! Thanks fro all the detail on how you went about painting and basing the Dutch. Which rules will you be using?
ReplyDeleteHappy Gaming,
Allan
Lovely painting and basing. As a enamel using dinosaur myself it's nice to see someone using them to such fine effect. And Grand Manner too, what fine taste!
ReplyDeleteAllan,
ReplyDeleteI game with "In the Grand Manner" by the Wargames Holday Centre which I quite like. Probably more importantly for me, I bothered to learn it and can't be bothered learning another set.
I have to aggree with the comments above great looking figures and real fine basing great job
ReplyDeleteI' only just starting my 28mm Napoleonic armies after painting up 2 large 18mm Ab Naps armies and I'm really looking forward to it
Cheers
Galpy