Wind Pumping: My Take on the Busaco Wind ... Mills? (PART 1)
Okay, I've not been to Busaco - it's next on my overseas trips whenever Covid is cleared. I decided I needed some little terrain features to add to the overall Spanishness of my wargames terrain. Somewhere in the top of the Busaco heights is at least one of these little buildings.
 |
| As the wind-pump (mill .. whatever) looks today. |
They are often referred to as windmills ... but of course a mill is a mill and wind power was used for different purposes not least of all was for water pumping.
 |
| One of the images I've modelled the outer works on. |
The Busaco building just looks too small to be a mill - but I admit to being no expert. I am speculating here (perhaps even wildly) but I'm inclined to assume that it is a wind pump-house to draw water up to the upland fields. Anyway, this makes no difference to how I went about representing it.
A while back I ordered a few texturing rollers from Green Stuff World and I knew this job was going to be my first test. I'd watched terrain making tutorials on YouTube and determined how I was going to approach this little project.
I started by rummaging through my odds and sods box and found the perfect sized cardboard post-roll off-cut. I cut it in half on the band saw in order to make the two houses. I then traced around them on 3mm MDF particle board, leaving a but extra leading to what would be the entrance and then cut it and chamfered the edges.
I glued the tubes to the MDF bases and left them overnight to dry. Once set, I drew a 30mm x 20mm doorway into each tube and then carefully cut them out with an exacto-blade. Then I was ready for the fun part.
I rolled a lump of DAS air-drying clay onto a sheet of baking paper using a roller. Well, actually is was a bottle of 2015 The Pond Pinot Grigio Chardonnay (Northern Victoria) ... better than fair on my palette. Anyway, once near 3mm thick, I then pressed the Small Brick pattern roller into and over the clay and hey-presto - a stone wall.
Liberally coating the tube with PVA, I then peeled off the trimmed clay sheet and wrapped it around the tube. I made sure there was an overlap and then sliced off the excess before smearing the two ends into each other with my fingers. Once done, I re-textured sections with the roller where needed.
I then trimmed off the excess clay from above the top line of the tube and then cut out the clay covering the doorway. You definitely need to do this before the clay hardens. Then I waited. And waited. It was clear in a Canberra winter this would be at least an overnight job. In fact it took the better part of two days but there were other parts to work on in the meantime.
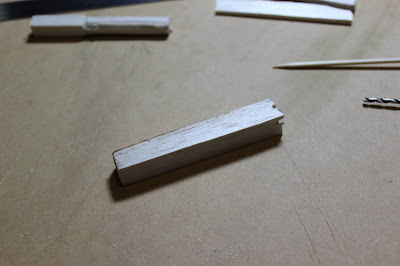
The outer-works (shaft, spines and rigging) were going to be balsa and bamboo skewers. The shaft was built using 10mm square balsa dowel which I started shaving down working initially on a share cut. I then carfully shaved off the square edges to attain an octagonal shaft.
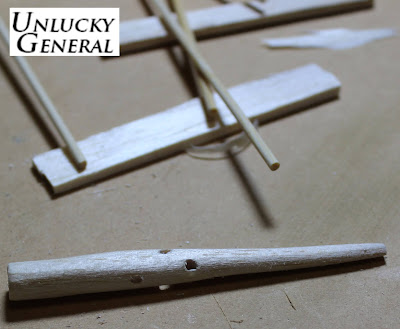
The shaft required four holes through the centre and set back from each other. Each entry and exit holes needed to align with each pair of opposing sides.
I'm afraid I can't give any specific measurements - I eye-balled most of this build.
I used a small modeller's hand drill to bore the holes simply becasue I could control the drilling - very carefully.
Just as carefully, I tested the fit of my skewers through the holes, gently twisting the skewers into and through the shaft points first. So far, so good.
Once satisfied with alignment of the holes and the fit for the skewers, I shaved down and sanded the shaft to near a point. I also worked on the rear or butt-end on the shaft for when I need to work it into the pump-house roof.
It was starting to look like what I thought it should at this point. I've been meaning to build wind-mills for years but never got to it until now. I was getting a bit excited.
Once the houses were completely set, it was time to build the roofs. Again, I didn't write down the measurements and started larger, cutting back three times until I got the diameter I needed. Cutting a radius in a paper disk I pulled the ends together to make a cone shape and once happy with the pitch, used the paper template on some thin card stock.
I glued with PVA (used throughout the build) and once dry, trimmed the edges even. I then started thinking about a support section inside which I could carve out a hole to receive the sail shaft.
Once they were glued and set, I carved back the protruding section in line with the slope of the roof, then carved out the receiving holes to take the shaft ends.
After testing, I glued on the rooves and then glued on the hooded sections which cover the shaft receiving ports. If you were wondering ... yes, I'm making up this terminology as I go along. As you can see, I fitted the doors and yes, remembered to do so before I glued on the rooves - very important tip.
As the initial roof-works dried, I moved onto rigging the sail array (formerly referred to as 'outer-works) using nylon cotton thread and Superglue.
I then clad the roof with the same cut card stock as before, rolling it and then trimming it after drying at the over-hang. You'll notice the gap at the top to allow for a roof cap.
... and capped! Before painting I'm hitting the whole roof with Mod Podge to seal everything and harden it right up.
I'd spent some time contemplating how to go about the sails. I thought about a heavy foil, I considered the same fine cloth I use for my flags and had also toyed with the idea of using tissue paper. In the end I opted for plain printer paper and it's worked very well. I ran a bead of PVA along the seam which I needed to run a line from and once set, I curled the bottom long edges of each sail and fixed them to the required masts with - yep, PVA.
Like everything on this build, the sails were an experiment that just worked. Once dried onto the masts, I carefully pulled out the sail lines, wrapping and Supergluing them to the adjacent mast head.
Each pump house required a steering arms on the opposite side to the sail shaft, so further cowling was required. Imagine that the whole roof is allowed to freely swivel on a central, vertical axle. The steering arms (simple wooden beams) are pushed or pulled to turn the sails in order to catch the prevailing and changeable breeze.
I did use an electric hand drill to bore the ventilation ports.
The loose lines of the sails were trimmed. You might see in the background I textured the bases with pre-mixed putty and pressed in my tile-grout and rubble mix for the earth. That's it for now.


Nice work, I look forward to seeing the final look. JJ
ReplyDeleteThanks JJ. I haven't dared start painting them yet - I need a flat brush I reckon and that will be my job for today. Cheers.
DeleteVery nice indeed…
ReplyDeleteI am not sure I would have had the patience to put the rigging on the sails… I look forward to seeing the finished models…
All the best. Aly
Thanks Aly. Considering how and what you sculpt, you definitely have the patience . I've got a bad habit of not painting building I make but this time blogging will make me push on.
DeleteCracking work on them mate, the sail work is outstanding bravo
ReplyDeletecheers
Matt
Thanks Matt. It seems to be taking me a while to paint it though. Back to work - such a time killer.
Deletefabulous build
ReplyDeleteThanks very much.
Delete